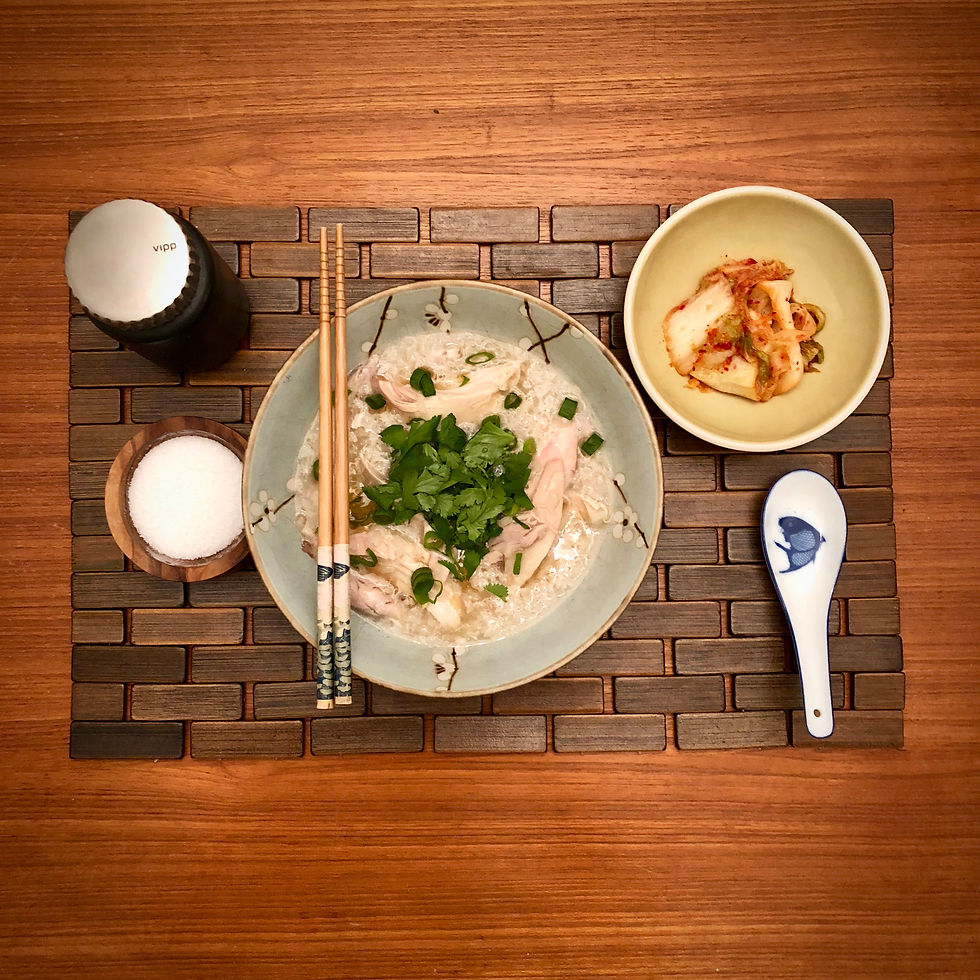
Instant Pot Korean Chicken Ginger Soup
- Regina Gordon

- Feb 18, 2018
- 3 min read

Here it is. My first official recipe that I'm throwing out into the universe. This was inspired by the fact that my entire house is crawling with winter germs and flu viruses. It's a miracle that I've been around two very ill people over the last two weeks and have not fallen victim (knock on wood).
Thinking back to my childhood, I remember my mom often making a really delicious Korean soup called Samgyetang, a ginseng chicken soup. It was a comfort food for me, but the interesting part about this piping hot soup is it's traditionally most popular in Korea during the summertime. Regardless, it is a very healthy and delicious soup year round.
Because I'm still nursing my 7 month old, Mikael, I made some changes to the soup since ginseng isn't recommended for breastfeeding or pregnant women. I decided to add more ginger instead of the ginseng along with some cilantro and it turned out really delicious. This is meant to be a very mild, silky soup that each person can season to taste with salt and pepper. The soup is great for cold season since it is full of delicious bone broth, ginger, garlic, cilantro, and served alongside kimchi, which has huge health benefits alone.
This is not a quick recipe in terms of time, but it is quick and easy prep so you can just set your Instant Pot timer and walk away. Here are all the things I got done without having to hover over a stove: washed dishes, prepped garnishes, fed, changed, and put Mikael to sleep, drafted this recipe, and wiped down the counters. I mean, that's reason enough to use your Instant Pot more, don't you think?
I hope you enjoy and that it helps bring your family back to health as well!
Instant Pot Korean Chicken Ginger Soup
Prep time: 15 minutes
Time to pressure: 27 minutes
Active cooking time: 45 minutes / High Pressure
Total time: 90 minutes
Serves: 4-6
Ingredients:
1 1/4 cups sweet rice
4 lb whole chicken
2 green onions (white part; reserve green parts for garnish)
3 1/4” slices of ginger (1” diameter)
3 jujubes (dried dates, can be found in most Asian markets)
5-7 garlic cloves depending on size and preference
1/2 T coconut aminos (soy sauce can be substituted)
6 cups water
Garnish:
Green onions (green parts)
Cilantro
Sesame oil
Sesame seeds
Kimchi
Instructions:
Pour sweet rice into the bottom of the Instant Pot container and cover with water. Let soak while you prep the chicken.
Use a knife or kitchen shears to remove the skin and excess fat from a whole chicken. This will make it easier to get to the meat later on and will also reduce the grease in the finished soup.
Wash the inside and outside of the chicken very well. Remove any giblets.
Rinse the sweet rice several times and and drain water.
Place chicken on top of the rice breast side up.
Peel garlic cloves.
Place garlic and ginger into the cavity of the chicken.
Add jujubes, white part of the green onions, and 6 cups of water to the pot.
Use the Manual function to set the Instant Pot to 45 minutes. Make sure the valve is closed. It took my Instant Pot 27 minutes to come to full pressure, so be sure you account for that in your cooking time.
Once the IP beeped, I let it naturally release for 5 minutes, but I don't think it was necessary.
Pull the chicken out of the soup and place on a cutting board, or I used a 13x9 inch pan, so you can remove the chicken from the bones without getting broth everywhere. The chicken will literally fall off the bones.
I used gloves to remove the chicken so I wouldn't burn my fingers. I prefer to leave it in relatively large chunks. Feel free to shred it further if you prefer.
Scrape any rice from the bottom of the Instant Pot and mix the soup together with the chicken and coconut aminos.
Serve up into bowls being careful not to serve the chunks of ginger or date pits.
Garnish with a drizzle of sesame oil, sliced green onions, and chopped cilantro.
Allow each person to season to taste with salt, pepper, and kimchi on the side.
Note: If your kimchi is not sour, leave the jar out on your kitchen counter for a few days until it gets to its desired flavor.


Comments